


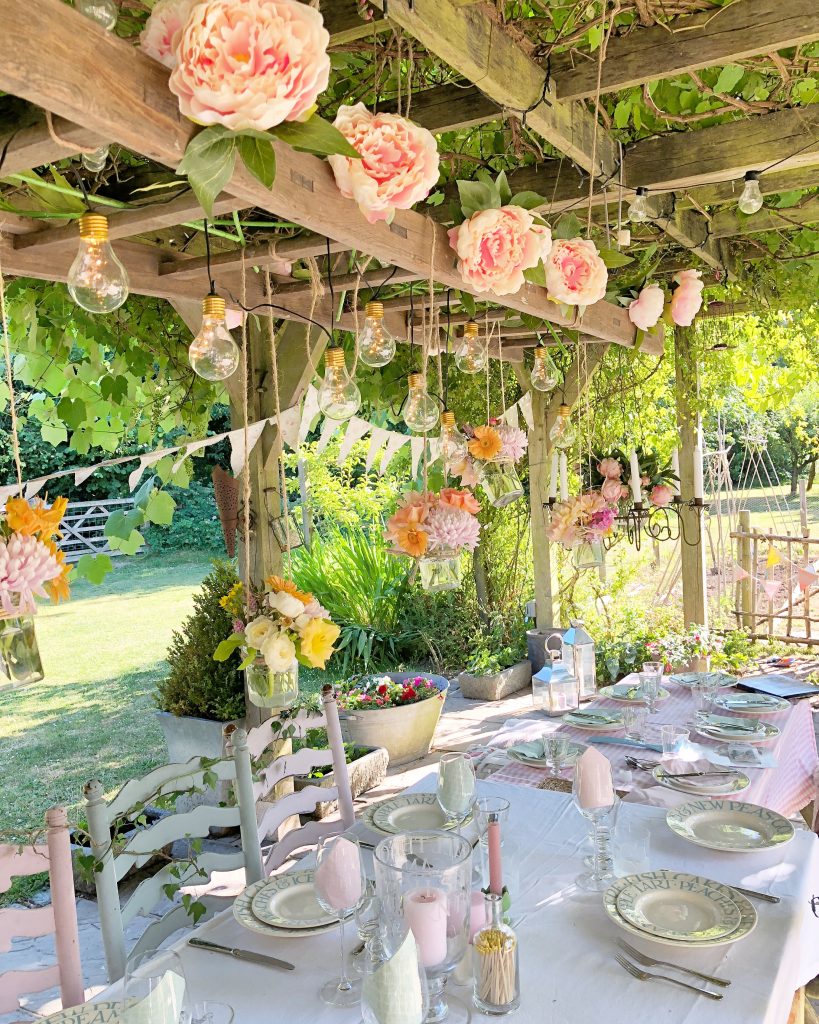
As you may already know from my updates over on the ‘gram, our beloved arbour will be partially dismantled this Summer, while we have some building work done.
You know how much I love dressing the area for alfresco dining, in the Summer, and I am slightly bereft that it’s going to be hard to make stuff look pretty out there for a while!
If you have followed me for a while, you will know that instead of fill the table up with decor, I like to hang stuff from above, leaving more room on the table for food. The space above the table is dead space and I think it really makes for a fantastic visual impact if you think about how to decorate it!
I love my guests to feel welcome so creating a lovely environment for them is really important to me.

It is a problem that loads of us have. I know I was lucky to have the arbour, we don’t all have an arbour to faff with.
So after a quick (well, you know, rabbit hole for a few days) look at Pinterest I came up with a plan. And asked Gav to help.
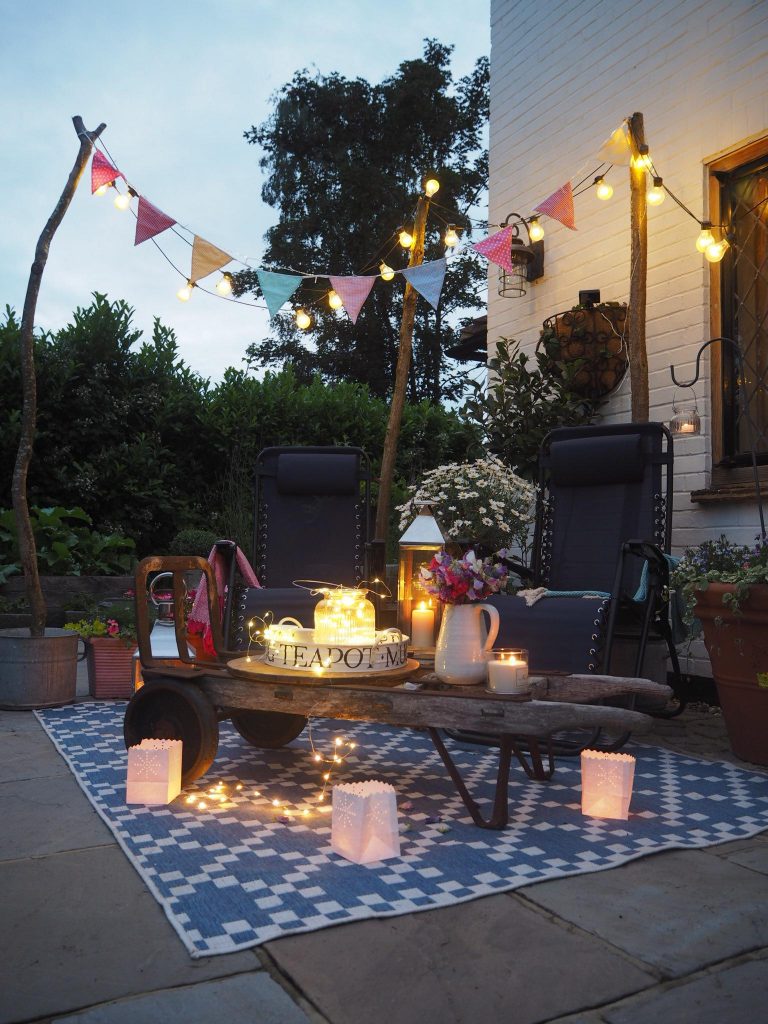
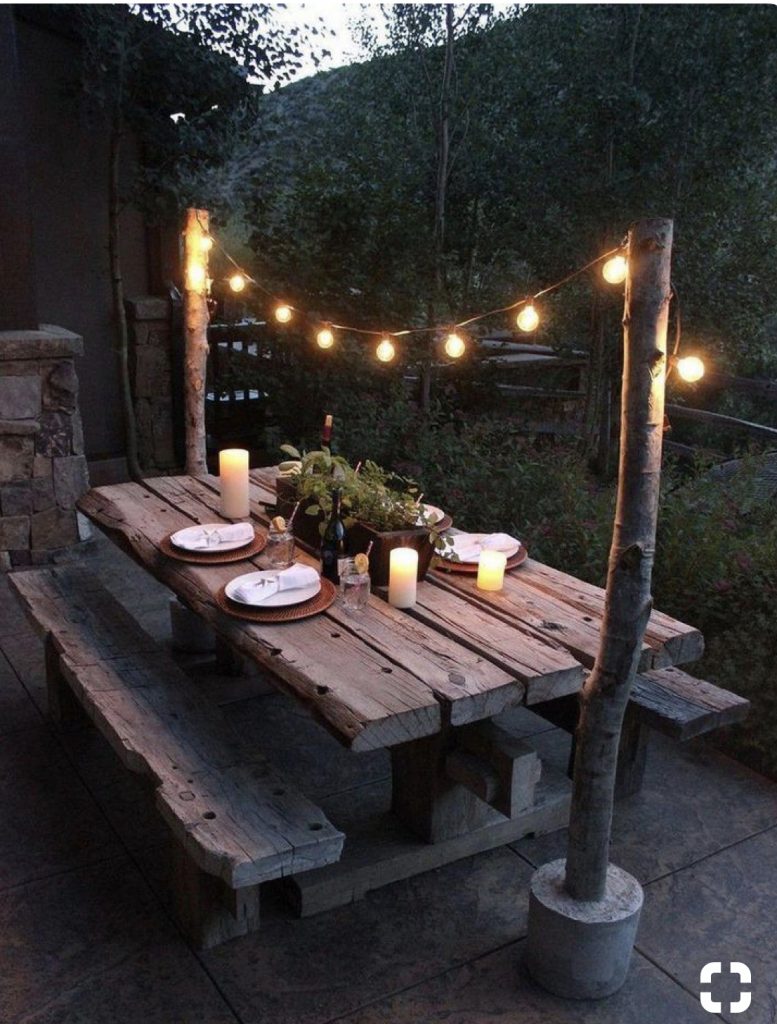
Here is my inspo pic
I hatched a cunning plan! But first we needed a few bits –
My shopping list –
Posts/poles
Builders buckets
4 Bags Aggregate
1 Bag cement
Galvanised tubs
Here is what we did –
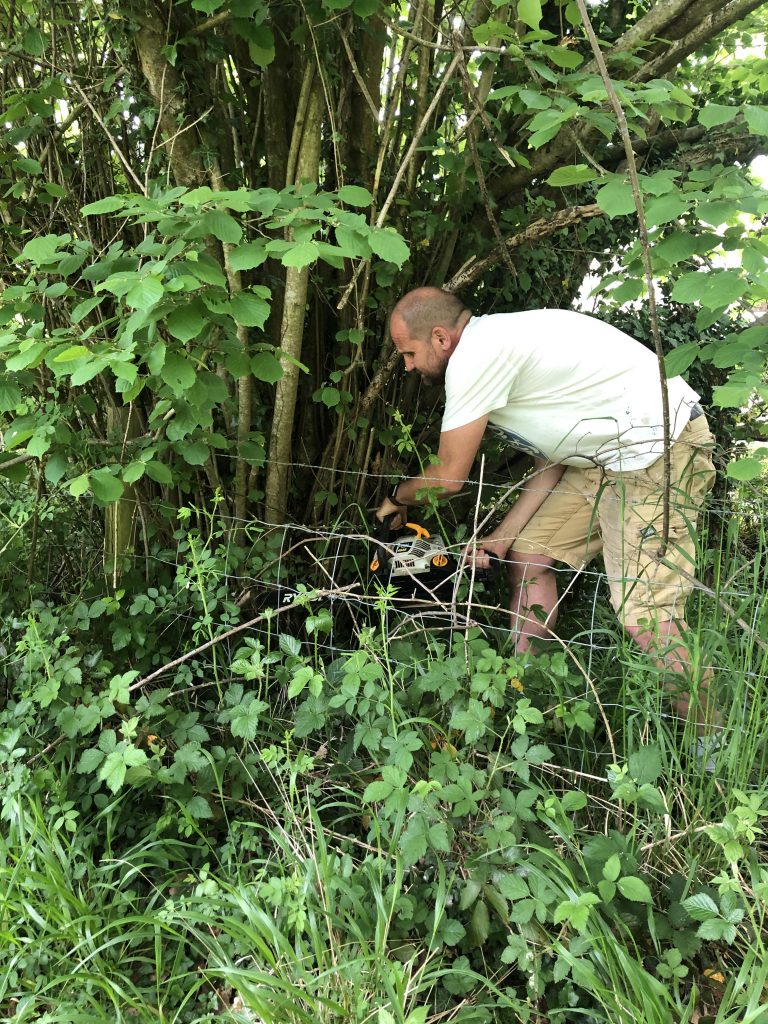 Step 1 –
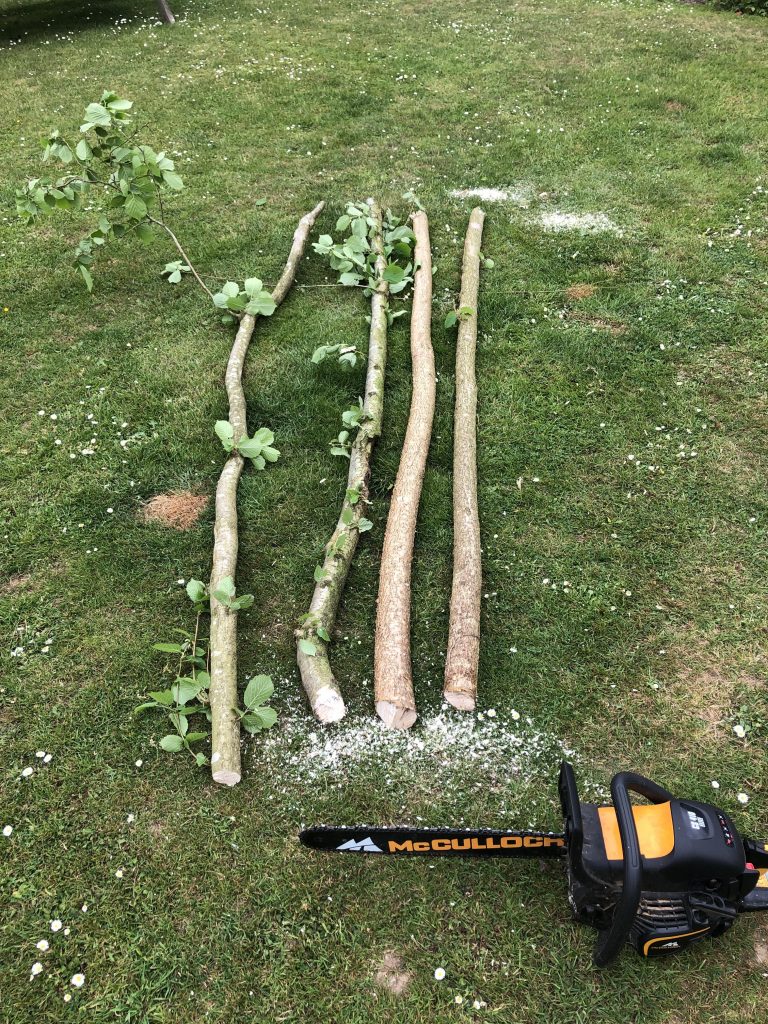
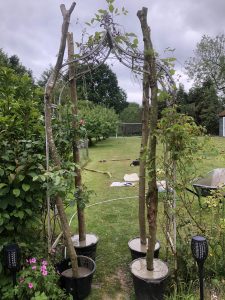
Persuade willing husband to chop 4 hazel branches – ours are in our garden.
If you don’t have either of those things – I found these fence posts in Homebase. Check the height – our hazel branches are about 2.4m tall but 2.1 would have been fine. Ours were cut from our garden – they need to be fairly straight.
Step Two
Cut a ‘v’ in the top of the posts (if you are using natural posts you might be lucky and have the ‘v’ already) The ‘V’ is so you can rest the festoon light wires in it, and tie bunting to the top. The first pic is a natural ‘v’ and we had to cut a ‘v’ in a couple of posts, I hope you can see that in the other 2 pics.


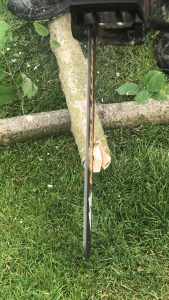
Step 3
Grab 4 buckets (if you don’t have any they are £1.30 each in Homebase)
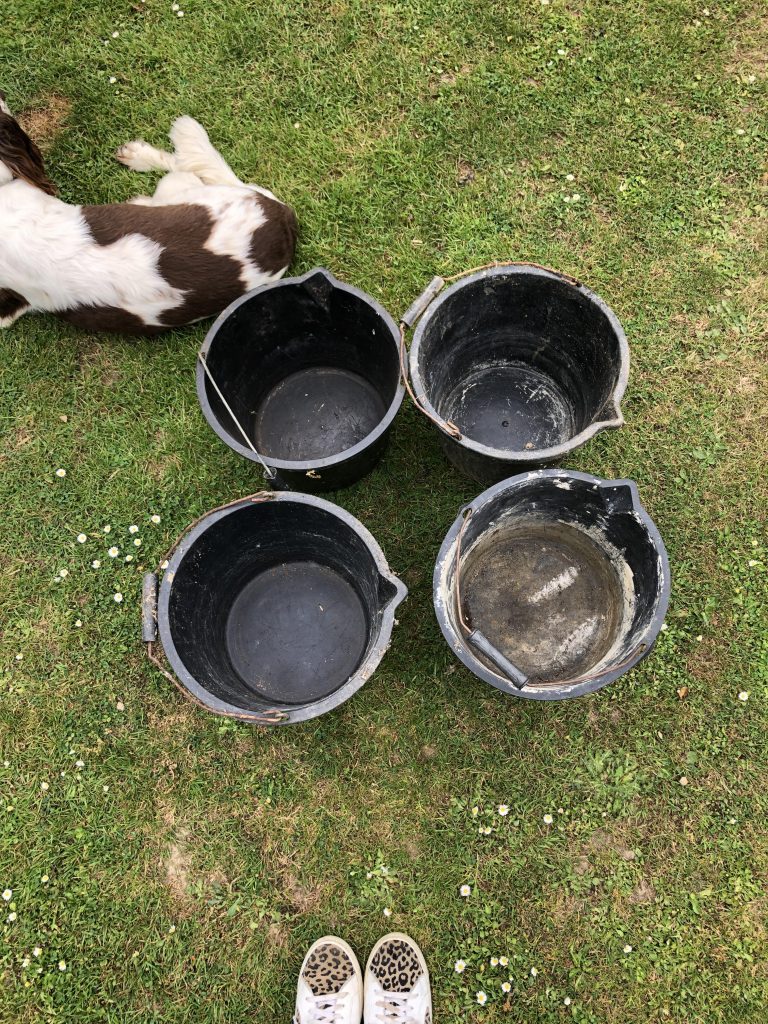
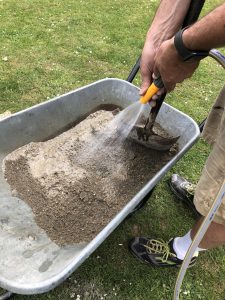
STEP 3
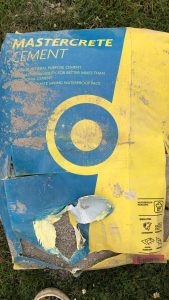
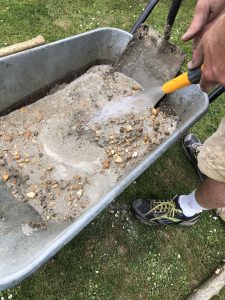
Now you mix your cement and ballast
For 4 posts we used 1 bag cement and 3 bags of ballast. (I linked to Wickes as I couldn’t find a link in Homebase. We had some from Jewsons so have a shop around and hopefully you can get it all in one place!)

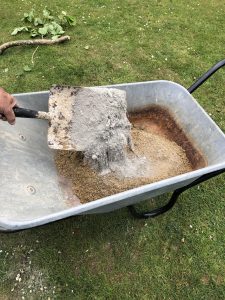
Mix it all up in a wheelbarrow. You will need a spade. Use the hose and add water until its all mixed and sloppy. Make sure it is REALLY well mixed.
Step 4
The next bit is a two person job
I held the posts in the buckets while Gav shovelled in the cement/ballast mixture – make sure you do it somewhere close to something you can tether them to. Or bear in mind they will need propping upright until the cement starts to go off, you might come up with a genius plan – we used our arch way and poured them very near so we didn’t have to move them far as they are quite awkward to move at this point!
Level off the top and tie them to whatever you are using to hold them upright!
Leave them a day or so to dry.
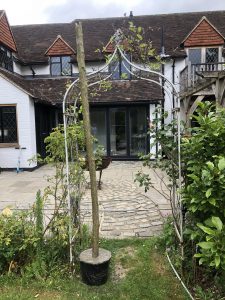
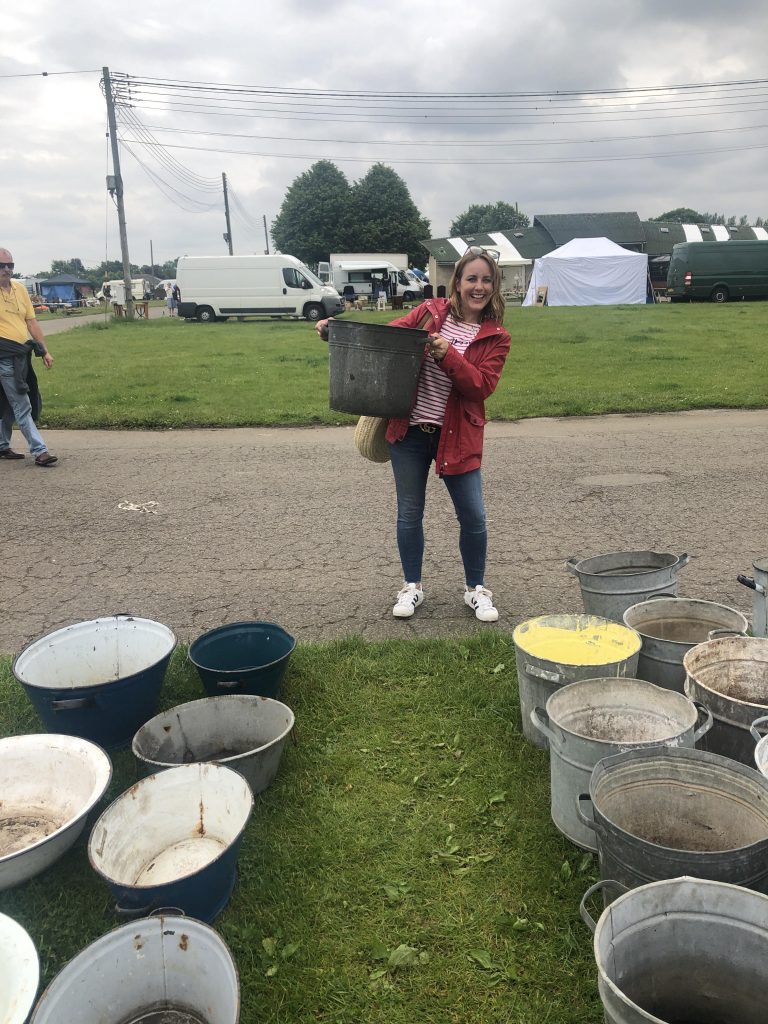
I wanted to put mine in vintage tin buckets and I found some at Ardingly Antiques Fair – Always barter – they are usually between £10 and £15. I bought 5 for £50 (always need a spare lol)
If you used the buckets I linked – you will need tin pots that are minimum 33cm wide by 26cm tall. Mine are all different sizes and they don’t match.
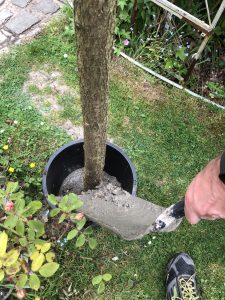
Step 5
Knock the builders buckets off and put them in the vintage pots. They are heavy so be careful.
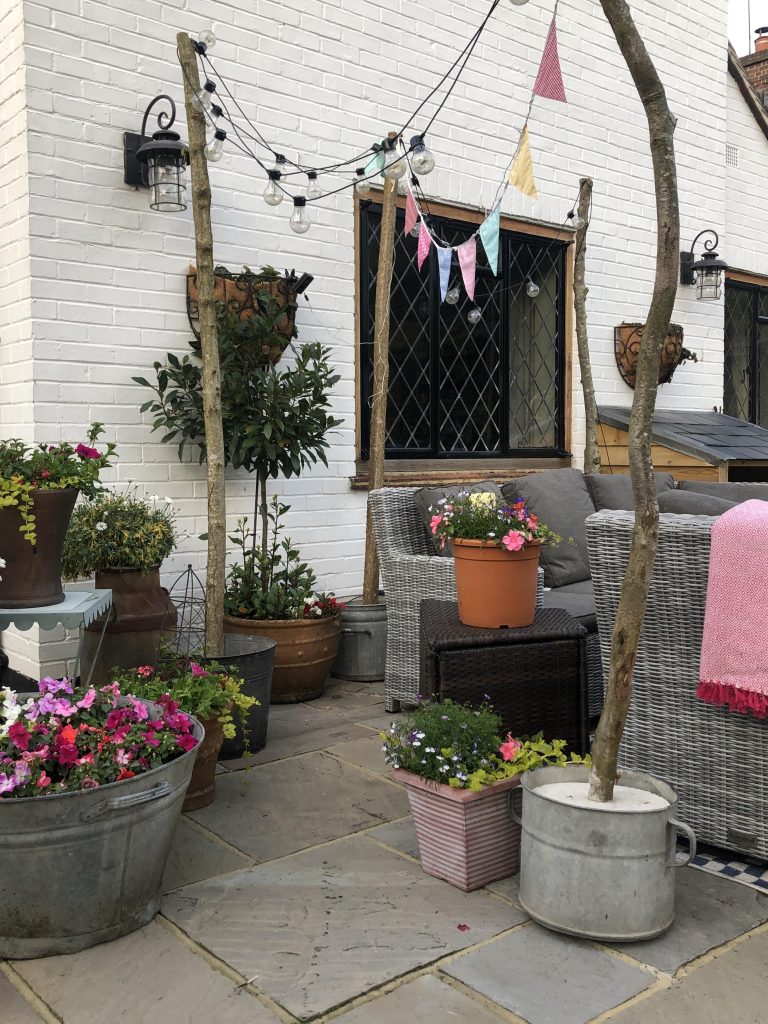
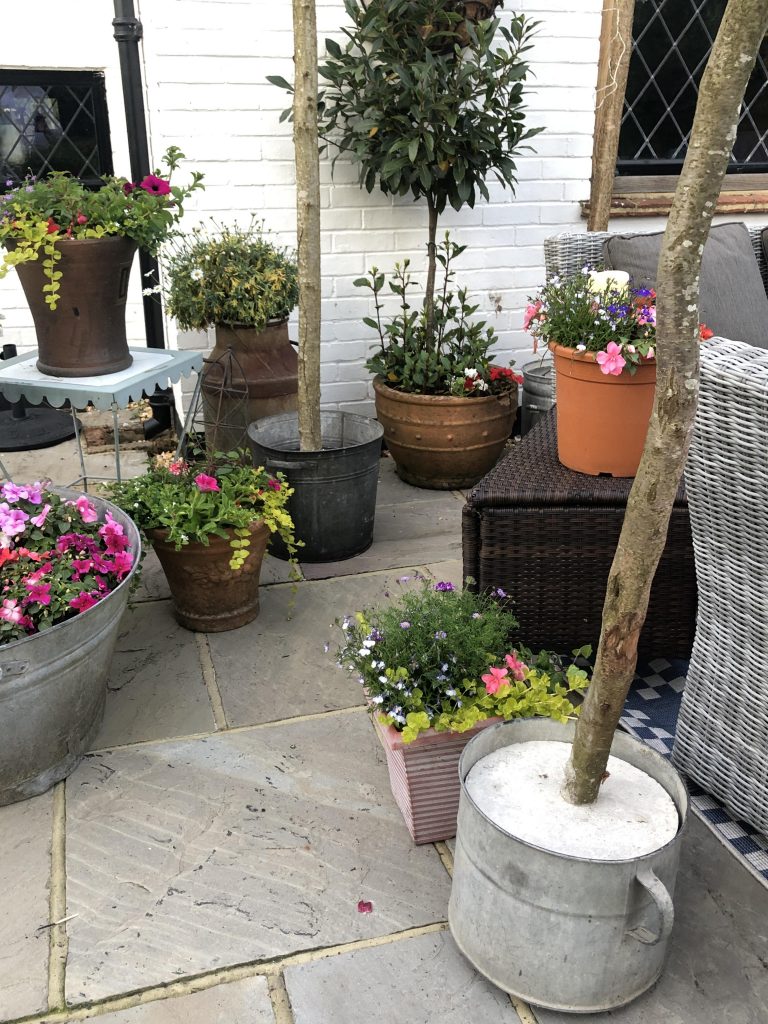 I still plan to cover the top in pebbles or moss but so far I haven’t !
As they are quite heavy to move, I definitely recommend you use tin pots (or whatever you decide) with HANDLES!
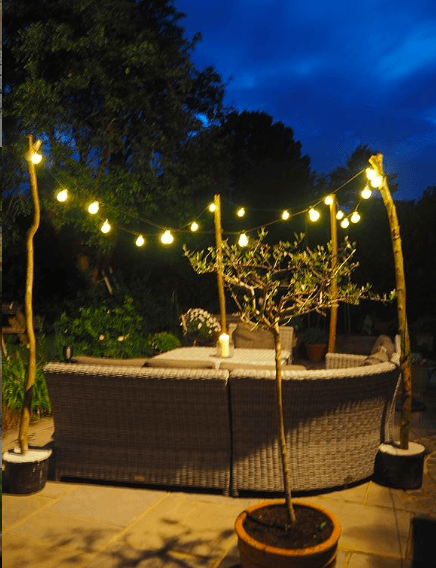
So there we have it!
I am sure there are loads of other ways to do this – If you have any hints to add, please add them in the comments to help any one else who fancies having a go!
Hope that’s useful! On reflection I think 5 would have been ideal, instead of 4…I do have a spare tin bucket ….:)
Good luck with yours! If you make them, I’d love to see
As ever
Thanks for popping by!
Love

ps – don’t forget you can bring a couple of them indoors and create ceiling stick arrangements – if you don’t want to put hooks in your ceiling, you’d just need to attach a slim branch or even just string or something, to the poles. Good luck with your creations!